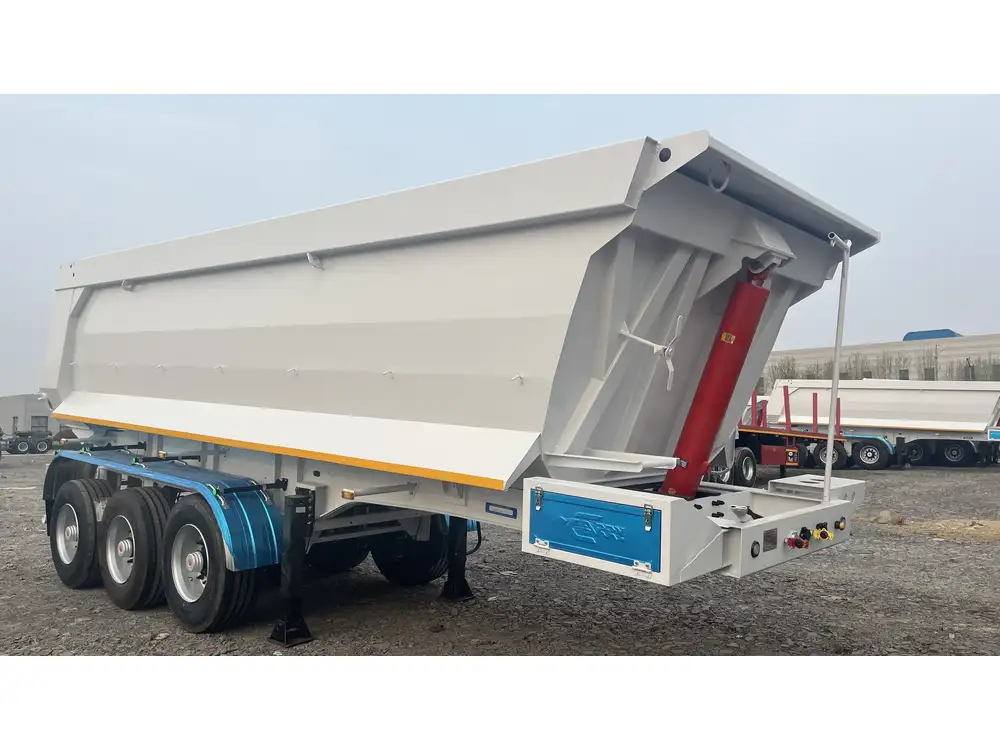
Creating a self-dumping hay trailer is a practical solution for farmers and livestock handlers who need a reliable method to transport and unload hay efficiently. The construction of a self-dumping hay trailer involves strategic planning, acute attention to detail, and an understanding of the materials and tools required for the job. In this detailed guide, we will discuss the construction process, materials needed, and vital design considerations to ensure your trailer meets the demanding requirements of agricultural use.
Table of Contents
- Introduction to Self-Dumping Hay Trailers
- Key Benefits of Self-Dumping Hay Trailers
- Essential Tools and Materials
- Step-by-Step Construction Process
- 4.1 Designing the Trailer Frame
- 4.2 Choosing the Right Axle and Wheels
- 4.3 Building the Loading Deck
- 4.4 Installing the Hydraulic System
- 4.5 Electrical Components: Wiring the Hydraulic System
- 4.6 Finishing Touches
- Safety Considerations
- Maintenance Tips for Longevity
- Conclusion
1. Introduction to Self-Dumping Hay Trailers
Self-dumping hay trailers are engineered for efficient unloading of hay, reducing manual labor and enhancing productivity. These trailers utilize gravity and hydraulic mechanisms to effortlessly tip the load, allowing for swift and clean unloading. Their design is central to their effectiveness, combining strength with innovative engineering.

2. Key Benefits of Self-Dumping Hay Trailers
Before diving into construction, let’s examine the advantages of using a self-dumping hay trailer:
- Efficiency: The self-dumping feature drastically reduces the time spent unloading hay.
- Labor Savings: Fewer manual efforts translate into cost savings and reduced physical strain.
- Versatility: Suitable for various hay types and loads, ensuring adaptability to varying farming needs.
- Durability: Constructed from robust materials, these trailers can endure the rigors of farm life.
3. Essential Tools and Materials
Gathering the right tools and materials is crucial for a successful build. Below is a comprehensive list:
| Tools Required | Materials Needed |
|---|---|
| Welding Machine | Steel Tubing (for the frame) |
| Angle Grinder | Plywood (for the deck) |
| Hydraulic Pump | Hydraulic Cylinders |
| Drill | Axle and Wheels |
| Wrenches | Hinges |
| Measuring Tape | Paint and Primer |
| Safety Gear | Electrical Wiring |
4. Step-by-Step Construction Process

4.1 Designing the Trailer Frame
The frame provides the structural integrity of the trailer.
- Dimensions: Standard trailer dimensions for hay typically range from 12 to 20 feet in length. Adjust according to your specific needs.
- Frame Configuration: Use heavy-duty steel tubing for the frame, crafting it into a rectangular shape. Ensure to account for the weight of hay when designing the support structure.
4.2 Choosing the Right Axle and Wheels
Selecting appropriate axles and wheels is vital for the functionality and mobility of your trailer.
- Axle Specs: Choose a heavy-duty axle rated to carry the maximum load expected, typically ranging between 3,500 to 7,000 lbs depending on the size and weight of the trailer.
- Wheel Type: Opt for larger wheels equipped with off-road tires to facilitate navigation across diverse terrains.
4.3 Building the Loading Deck
The deck is where hay is loaded and stored for transport.
- Material Selection: Using plywood or treated lumber provides a suitable combination of weight and strength.
- Construction: Attach the deck to the frame securely with bolts, ensuring it sits level and balanced.

4.4 Installing the Hydraulic System
The hydraulic system is key to the self-dumping feature.
- Hydraulic Pump: Select a pump suitable for the weight and dump angle of your trailer.
- Cylinders: Install hydraulic cylinders on hinges mounted at the back of the trailer. This setup enables the rear to pivot upward, allowing the contents to slide out easily.
4.5 Electrical Components: Wiring the Hydraulic System
Electrical connections are required to operate the hydraulic system effectively.
- Wiring: Use weatherproof connectors and cables. Ensure the system is easy to reach from the tractor or truck used to tow the trailer.
- Controls: Install a toggle switch in a convenient location, ensuring that it’s accessible but safely away from operational hazards.
4.6 Finishing Touches
The final steps involve ensuring safety and aesthetics.
- Paint: Apply primer and paint to protect against rust and corrosion, choosing bright colors for visibility.
- Safety Features: Consider adding reflective tape or lights for visibility during low-light conditions.

5. Safety Considerations
Safety is a paramount concern when working with heavy machinery and structures.
- Wear Safety Gear: Always use gloves, goggles, and protective clothing when working with metal and heavy equipment.
- Load Limits: Clearly mark weight limits on the trailer to prevent overloading.
- Regular Inspections: Conduct routine checks on the trailer’s structural integrity and the hydraulic system to prevent accidents.
6. Maintenance Tips for Longevity
To ensure your self-dumping hay trailer operates efficiently for years to come, regular maintenance is essential:
- Routine Cleaning: After each use, clean the trailer to avoid hay rot and rust accumulation.
- Lubricate Moving Parts: Regularly lubricate the hydraulic cylinders and hinge points to ensure smooth operation.
- Check Fluid Levels: Ensure hydraulic fluids are at the correct levels to maintain reliable operation.
7. Conclusion
Constructing a self-dumping hay trailer is both an ambitious and rewarding project that can enhance the efficiency of your farming operations. By following this comprehensive guide, you can create a durable and effective tool that saves time, reduces labor, and stands the test of time. Whether you’re building for personal use or looking to invest in agricultural equipment for commercial purposes, the benefits of a self-dumping hay trailer are indisputable.
Arming yourself with the right knowledge and materials will ensure your venture into building a self-dumping hay trailer is successful, paving the way for increased productivity on your farm. Don’t just settle for traditional methods; build a solution that aligns with modern farming efficiency!


